Your Cart

Radioddity DB25-D Mini Mobile Radio | 20W | Analog & Digital DMR | VHF & UHF Dual Band | GPS / APRS | SMS | Color Screen | 300000 Contacts

Write a review
SKU: 715-RC-DB25D
  • Regular price $239.99
  • Regular price $239.99 SAVE $0.00


Only 269 left in stock

Current Stock Status
United States
Europe
CODE WARD24
Copy
Get extra 10% OFF

Note: This code is not allowed on Sale Bundles.


FCC ID: 2AN62-DB25D

20W output power + 300K DMR Contacts: The Radioddity DB25-D is a mini powerful mobile radio with a compact design. Featuring 20W/5W high-low power selectable and 300,000 DMR contacts storage, allowing bulk import via software.

Dual Band, Dual Mode and even Dual Standby: The DB25-D is a dual-band radio supporting both VHF and UHF transmission. You can switch between analog and digital (DMR Tier II) operation modes at any time. Besides, it’s with dual standby function.

GPS Function: The DB25-D is with GPS function which can be used for APRS, which is for real time digital communications of information of immediate value in the local area. This makes it a ‘must go’ for any off-road and overland communities.

Color Screen & Dual Speakers: The radio comes with a multicolor high-resolution screen. It has two speakers: one in the mic and one on the front of the radio, you can choose whether to use both or just one of the two. There is a microphone gain option as well.

7 Customizable Keys: 3 on the radio and additional 4 on the speaker mic, each with Long / Short press options. You can set different functions according to your operating habit.

Disclaimer: No License is required to purchase this radio, nor to Monitor (listen) to the many Amateur (Ham) Radio frequencies. However, an FCC License is required to Transmit (Talk) on Amateur Radio Frequencies in the USA. Please visit http://wireless.fcc.gov/services/amateur/licensing to learn more.

CLICK HERE to download the manual and extended manual (>200 pages).
CLICK HERE to download the latest DB25-D firmware and CPS.
CLICK HERE for directions on how to get on Air with your DMR Radio.


RELATED BLOG
Radioddity DB25-D New Firmware Release 2023-07-06
Dear Radioddity DB25-D customers, Hopefully you haven't given up hope of ever receiving another firmware update for your DB25-D. Today we at Radioddity are very proud to finally release this long awaited update. You can be sure that we will remain committed to the Radioddity DB25-D and will continue to provide new and updated firmware versions for our customers for free. Three of the most awaited enhancements are certainly: - Analog DTMF is now possible with the Radioddity DB25-D. - Reduction of initial volume (yes, this is now implemented as well). - No more need to create an RX group if you only want to listen to the talkgroup assigned to the channel And of course, the DMR ID data is now displayed correctly as expected. The most convenient way to upload/update this DMR ID data on the Radioddity DB25-D is probably to use David, mm7dbt's CPEditor (www.cpeditor.co.uk). Make sure you are using the Radioddity version of CPEditor. Be sure to read our release notes before you start updating your Radioddity DB25-D. A complete list of all changes/additions can also be found in the release. --- --- --- --- --- --- For full details, please click Radioddity Download Page to download and check out the corresponding files. Relevant Blog: How to update Radioddity GD-88 & DB25-D Firmware? Relevant File: Precise Directions on How to Update the Firmware of Your Radioddity DB25-D --- --- --- --- --- --- We would like to thank all Radioddity DB25-D and GD-88 customers for your constructive feedback. If you do find any bug in the radio's firmware, our CPS, this documentation or if you are missing a feature, you would have expected, contact us or directly write an email to support@radioddity.com. In general, the software and firmware updates for your Radioddity DB25-D and Radioddity GD-88 are free of charge. Using a CPS or a firmware not originating from Radioddity may void your warranty.
How to Update Radioddity GD-88 & DB25-D Firmware?
In general, an update of PC-software (CPS) or radio-firmware should only be done if it is really required, following the golden rule that "If it isn´t broken, don´t fix it!". Notes: ⅰ. Prior to performing a firmware update, save the current codeplug to a file. After doing so, the firmware update may be applied. Finally, the previously saved codeplug should then again be written to the radio using the corresponding CPS. ⅱ. This firmware update guidance works for both Radioddity GD-88 and Radioddity DB25-D   Before update, the following items are needed: ⅰ. Programming cable ⅱ. Radio ⅲ. A computer running the Windows (XP/Vista/7/8/10/11) operating system ⅳ. Download the firmware and update tool through Radioddity Download Page ⅴ. Make sure the radio is with sufficient power / stable power supply   Firmware Update Steps 1.Install the Firmware Update Tool To install the updater, just unzip the archive you downloaded from Radioddity support and double click on the file, named "IAP(setup).exe". This will install the firmware update program on your Windows machine and place a shortcut on your desktop. 2. Put the radio into firmwamre update mode ⅰ. Turn off the radio. ⅱ. Close the CPS (in case it had been running) in order to make sure the virtual COM-port of your programming cable is not occupied. ⅲ. Connect your Radioddity GD-88 or DB25-D via the supplied programming cable to your Windows PC. ⅳ. Press the [P1]-key on top of the Radioddity DB25-D and keep it depressed. For the Radioddity GD-88 it is the upper sidekey [P2] that needs to be kept depressed. ⅴ. Additionally turn on the radio either by turning the volume key clockwise (Radioddity GD-88) or by pressing the "power key" left to the [P1]-key (Radioddity DB25-D). ⅵ. The status-LED will constantly light up red. ⅶ. On the Radioddity GD-88 a special screen will be displayd with either "IAP_A" or "IAP_B" shown in the top line. On the Radioddity DB25-D, the display will stay blank and backlight will be on, regardless of your normal settings. ⅷ. Release the [P1]-key (Radioddity DB25-D) or the upper sidekey [P2] (Radioddity GD-88).   3. Start the update tool   4. Choose the virtual COM-port that does represent your programming cable 5. Click on "Open" Note: If the update tool connect to your Radioddity DB25-D or GD-88 successfully, it will output "IAP Successfully". If it isn´t able to connect to the radio, it will stay on CommPort:COM "x" (where "x" represents the selected virtual COM-port number of your programming cable ). If you forgot to shut down the CPS, you will get a "The COMM port is occupied or doesn't exit!" error.   6. Click on the button "Open APP file". 7. navigate to the path that does contain the update file that is intended to be transferred to the Radioddity DB25-D or Radioddity GD-88, such as: "C7000_DR880UV_HAM_A_2022-10-27" Note: ⅰ. Do not use update files intended for other radios, even if those radios may be looking like the Radioddity DB25-D or Radioddity GD-88. Using files not intended to be put on a Radioddity DB25-D or a Radioddity GD-88 may result in a loss of any guarantee ⅱ. Whereas a firmware update for the Radioddity DB25-D consists of just one file, the Radioddity GD-88 does require two separate files. One for each independent VFO (A and B). To select the target location of the file, long press the upper side key [P2] of the Radioddity GD-88 to switch between "IAP_A" and "IAP_B". The firmware files are normally marked with "HAM_A" and "HAM_B".   8. To start the actual update process, click on the ‘IAP’ button. Note: Do not press any key on the radio, do not remove power, just wait until the radio has finished the update process and turns off! During the update process, the status-LED will flash green and red and the application shows the progress by the increasing number of "Current Page". As soon as the update has finished on the Radioddity DB25-D, the radio will automatically shut down, whereas the Radioddity GD-88 will state the following on its screen "Status: Rec Done!". If you have just updated one of the two GD-88 VFOs it is now time to select the second VFO (long press of the upper side key) and update it with its corresponding firmware file as well. After you have updated both VFOs of the Radioddity GD-88, turn off the radio.   9. You may now normally power on the radio again. To check which firmware version currently is installed, click: MENU → Device Info → Version he output will look similar to:   Enjoy the new firmware!
Radioddity GD-88 Now Supported by CPEditor!
Radioddity GD-88 now also fully supported by CPEditor As you may know, David MM7DBT´s CPEditor already does support our well-selling Radioddity DB25-D mobile radio for quite a long time. We are happy to tell you that now David additionally added the functionality required to fully support the Radioddity GD-88 handheld radio as well! In order to make the transition even easier, his CPEditor even allows to write a DB25-D codeplug formerly created with his CPEditor to a GD-88 or a GD-88 codeplug to a DB25-D. His CPEditor has been successfully tested with the initial firmware as well as with the newest release and we are confident, that future firmware releases of the DB25-D and GD-88 will also be fully supported by his CPEditor. Besides general functionality to write a codeplug to the radio and read it from the radio and store it in a file, his CPEditor is also capable of updating the radio firmware, changing the startup-logo and writing the DMR-database (even selectable per country) to the radio. Just one single tool does it all. Now searching for an updated DMR-ID database, personalization of your radio, keeping it fresh... and some more functionality is included within just one single tool that even runs under Windows 11 and supports all COM-ports. However, two things Radioddity customers should know: 1. Radioddity does not give any support to his editor. If you have any suggestions or need help/support about it, please use David MM7DBT's wiki and forum to communicate with the community. 2. If you do use David MM7DBT´s CPEditor and feel happy, please consider honoring his work by using the donating link as found on his Codeplug Editor website. Download here the Radioddity version of his CPEditor today!   Little Secret: The next update of his editor will also support new features that will be part of the next Radioddity GD-88 firmware update. Stay tuned...
Bugfix for Your Radioddity DB25-D and GD-88
Since a long time, there had been a nasty bug hiding in the firmware of our DB25-D and GD-88. Under certain circumstances this did prevent the correct display of DMR ID data that had previously been written to the radio on the radio screen. This bug has now finally been eliminated for both radios. If you update your radio with that new firmware, you also do need the newest version of our CPS. What´s been fixed: • DMR ID data is now properly displayed (no more display of wrong DMR database data) • Assignment of 1450 Hz Pilot tone fixed (does require at least CPS 3.3 DMR CPS_DRS [9.2.16]) • minor fixes within the Talker Alias display • support for programming cable based on FTDI-chip • Radioddity DB25-D only: ‘Dual Watch’ added as option to be assigned for a programmable function key. This results to the very same functionality as the switch for Single or Dual VFO display mode found within the radio menu at ‘Local Set ➙ DisplayMode ➙ S/D mode’   Note: When assigning one of the burst tones / pilot tones to short press of a programmable p-key, the long-press function will not be available. So best would be to assign burst tones / pilot tones only to long-press of p-keys.   Known issues: Non-standard ASCII-characters are not yet supported for Talker Alias. If received Talker Alias data contains such non-standard ASCII-characters or the Talker Alias data received had been encoded using UTF-16, only part of the Talker Alias data will be decoded successfully. --- --- --- --- --- --- For full details, please click Radioddity Download Page to get and checkout the release notes of the various archives. Within our support pages for the DB25-D you will find: • 2022-11-20 Radioddity CPS 3.3 [9.2.16] (file: 2022-11-20 DB25-D and GD-88 CPS 3.3 DMR CPS_DRS [9.2.16].zip) • 2022-11-23 Firmware 909E.D64.EARSAB.018 (File: Radioddity DB25-D firmware 909E.D64.EARSAB.018.rar) Within our support pages for the GD-88 you will find: • 2022-11-20 Radioddity CPS 3.3 [9.2.16] (file: 2022-11-20 DB25-D and GD-88 CPS 3.3 DMR CPS_DRS [9.2.16].zip) • 2022-11-20 Firmware B49E.D64.EHPSAB.010 (file: Radioddity GD-88 firmware B49E.D64.EHRSAB.009.zip) --- --- --- --- --- --- Relevant Blog: How to update Radioddity GD-88 & DB25-D Firmware?
How to Set Up APRS to Radioddity DB25-D
------ by SAVO LUZAR S52SX 1. Guide how to set up APRS to Radioddity DB25-D 1.1 BASICS 1.1.1 Update radio to the latest firmware and use proper software for programming your radio. 1.1.2 Always read code plug from radio, make a change to code plug and then write it back to the radio, because in this case your code plug will have all correct data that match to your radio. 1.1.3 Never write data to the radio from different version of CPS, while this will lead to unpropped function/working of your radio. 1.1.4 That guide will work only in WINDOWS environment on your PC or Laptop. 1.2 Settings in Radio Radioddity DB25-D You need to prepare your radio for APRS. Press Menu, go to Appendix, Choose GPS (red icon) and you will see this menu. Enable GPS Switch. Under GPS Serial Data tick all options. Go to Calibrator and set to AUTO. Now go back to appendix menu and choose APRS. In APRS Menu you have 5 options: APRS Type, Analog APRS, DMR APRS, Timer and Beacon. Select APRS Type, you will see 4 options, select DMR+Analog APRS. Under Analog APRS choose PTT Upload and choose TX End. All other settings we will made in CPS. 1.3 Connect your Radio to your PC/Laptop Connect your radio with USB cable and set proper USB Port by clicking on Comm Menu. Choose proper COMM port and click Read, you will get response from your radio. Always Read from the radio, do not open saved code plug. 1.4 DMR Service Menu Go to the DMR Service and set: GPS to ON, GPS Interval 10s, GPS Channel OFF 1.5 APRS Menu Under the MENU APRS you have following: 1.5.1 Black frame settings: Manual TX, set 15. APRS Auto TX Interval set to 30s. Under Beacon – set Beacon. Here you have two options – GPS Location or Fixed Location. If you choose Fixed Location your radio will transmit GPS Coordinate marked in green frame! 1.5.2 Green frame settings: You can find own coordinates by web browser or visit www.aprsdirect.com. Be Aware that those Coordinate are in Slovenia right now. Those are in format Latitude 46°10' 11ˇ N and Longitude 14°20'18ˇ E 1.5.3 RED frame settings: TX frequency: for Europe Africa and Russia is 144.80, for all other counties check picture bellow. TX QT/DTQ – this is analogue or digital tone. Leave this to OFF. If in your country is in use tone, that ask your local igate owner what kind of tone is used to open igate. Transmit Delay and Preware Time: Optimal setting are 500ms and 300 ms, if you think this scan be decreased, go ahead and test it. 1.5.4 BLUE frame settings: YOUR SSID: you have options from 0 to -15, it up to you what kind of extension you would like to have. Usually 0, -1.-2 are used for fixed location, -7 for weather station, all other extension can be normally used. APRS Signal Path: WIDE1-1, is working fine, you can also use WIDE2-1 and WIDE2-2. Always use this without any space. You Call Sign: put in your call sign. APRS Symbol table: there are two option according to APRS map chart – primary symbols ˇ/ ˇ and alternate symbols ˇ \ ˇ Map Symbols can be found at this link: https://www.yachttrack.org/info_camper/downloads/APRS_Symbol_Chart.pdf APRS Map Icon: According to the map symbols you can use whatever icon you like. Your Sending Text: Here you can write a text, that everyone can be seen, if click on your call sing in web page www.aprs.fi or www.aprsdirect.com 1.5.5 Yellow Frame Settings: This setting are for digital APRS via DMR repeater’s. Report Channel You can choose Current channel, or any other channel in your channel list. I recommend to use Current channel. APRS TG: this is assembly from country code (293 for Slovenia) and 999 for TG for Brandmeister. 293999 is for Slovenia. Report Slot: In Europe is allowed to transmit Digital APRS only on Time Slot 2. Call Type: Digital APRS must be set to Private call. PTT: options are OFF and ON. If you choose ON, that every time you released PTT button radio will transmit APRS. 2.0 Digital APRS registering at Brandmeister. For Digital APRS you must be registered to Brendmaister. Please check what type of DMR repeaters are in use in your country. Go to the following web page: https://brandmeister.network/ Klick register and filled up all necessary data. Sometimes you need to way a while that your account be to confirmed. After confirmation click to Login and put in your credentials. Click on your call sign on the right upper corner and choose Selfcare. Brand: Choose Chinese radio. Language: Choose your language on drop down menu. APRS interval: choose 60s. APRS Callsign: put your callsign and extension from -1 to -15. APRS Text: put your text in, but MAX 12 letters! APRS Icon: choose your Icon which will be displayed on web pages like aprs.fi and aprsdirect. In Call GPS, Compact/CSBK data and Text Capture: leave to OFF. AirSecurity/TOTP: OFF Hotspot Security: if you have a hotspot, then put in your personal password. Do not forget to press SAVE button at the end. 3.0 Channel setting in your code plug for analog APRS For test make one analog channel and name it APRS ANA. Put correct RX and TX frequency for your country. Check picture above. Move slider to the right and under APRS choose APRS(A) for this analog channel. Column marked with RED - you can choose from OFF to 9 APRS(A) in drop down menu. Row marked with Green is channel we made for test. You need to choose APRS (A). As you can see you can choose analog APRS(A) on any channel! WARNING: analog APRS will work only on analog channels! 4.0 Channels settings in code plug for Digital APRS NOTE: in Europe digital APRS is allowed to transmit only on TS2! On your digital channel, set everything as normal talk channel, TX, RX frequency, Power, TX, RX Time Slot, TX, RX Colour Code… etc. At the end of the row, on the right side, under the APRS column for TS 1 choose 2, and for TS2 choose 1 - that mean current channel. Under APRS Menu you need to choose Report Channel, filled in proper APRS TG, you need to choose TS2, Private CALL and under PTT is option, when you released PTT button APRS will be sent. Now press button WRITE that everything will be written to your radio and wait that radio reboot itself. 5.0 How to obtain GPS Lock on your radio 5.1 Option 1 You need to be in open spare/area and have visible look to sky. Turn on radio and wait that radio lock to the GPS satellites When Radio locked to the satellite you will observe green icon in the upper centre of the screen. If there is NO GPS lock icon is RED. 5.2 Option 2 You can buy a kit of two GPS antennas with SMA connector and connector for external power supply. One is receiver (install it outdoor) and second antenna is transmitter (install it indoor), connect external power supply and you have GPS signal in your room. 6.0 DISLACIMER I’m NOT TAKING ANY RESPONCIBILLITY for any sort of damage or any sort of interferences you may make with your radio equipment. Everything you do, you do it on your own risk, don’t blame me, if there will be some damage or not working. Read manuals again! If you not familiar with DMR please take your time and search on web or ask any of your colleague what DMR is and how it works. If you not know how to program your radio, then ask any of your friend how to do it. WARNING: Firmware is not finish yet so Digital APRS will transmit and proper work only on TS2 DO NOT CHOOSE Digital APRS to work on TS1, because IT WILL NOT WORK and you will make an unnecessary traffic on TS1! NOTE2: Digital APRS will work only on digital channels! That guide is completely my project and its only lead you how to set up your radio to send Analog and Digital APRS. We are working very hard to fix firmware in the near future that all function will be operational
Getting on Air with Your DMR Radio v2.2 (Updated: 2023 May)
Our engineers have been busy and did a complete review on the old version of our 'Getting 'on air' with your new DMR radio' document. The former version was already quite old and needed an urgent review. Now the archive includes not only the 40 page document that´s supposed to get you started with DMR without taking all those hurdles that normally show up. The archive also includes sample codeplugs for Radioddity GD-73, GD-77, GD-88, DB25-D, RD-5R and GD-AT10G. Besides those, it also comes with sample codeplugs for Baofeng DM-1701 and TYT MD-9600. And in order to support you on getting the required parameters in order it also includes a bunch of spreadsheets. What can you learn from this document? 1. Disclaimer 2. Make yourself familiar with DMR 3. Apply for and receive your DMR ID 4. Gather information about a DMR station 5. Install any USB-driver that might be required 6. Install CPS according to your DMR-capable radio 7. General process of creating a DMR code plug from scratch 8. Sample codeplugs Get you copy of the archive > CLICK HERE <
Beginners Quick Guide | The Basics of DMR Digital Mobile Radio (Updated: 2024)
--- by Jason Reilly Introduction: "The nice thing about standards is there are so many to choose from." I love the ironic humor in this statement; a standard should result in everyone doing things the same way in order to be compatible, and prevent having to constantly re-invent the wheel. Yet, everyone has to have their own standard! Just take two-way radio digital voice systems for example: there’s P25 phase 1 and phase 2, NDXN, DMR, TETRA, OpenSky, Provoice, and dPMR, along with a whole host of legacy digital voice modes as well. That doesn’t even consider the ham radio contenders, such as DStar, Fusion, FreeDV, some old offerings from Alinco & AOR and so on. And guess what? Absolutely none of them are compatible! Choosing what digital voice standard you'll go with can be daunting. For emergency services and government communications, P25 is by far the most dominant, there’s no doubt about that. For business & private radio, DMR followed by NXDN is the two most popular choice. In the ham radio arena, the picture is a little less clear. DStar took an early lead, but Yaesu is keen to take market share with their Fusion offering. Hams have always been keen to leverage off existing commercial equipment, and it seems the most popular commercial system adopted presently is DMR. Personally, I think DMR will take the lead in both the commercial business & private two-way radio field as well as in ham radio. This is helped in no small part by the ready availability of DMR radio equipment at prices that rival traditional analog two-way radio, and that one of the biggest names in two-way radio, Motorola, are throwing their weight behind DMR.   Motorola's SL7750 blurs the line between DMR radio and cellular mobile phone   Three flavours: There are three "tiers" or levels of functionality for DMR systems. Tier 1: The simplest form of DMR is Tier 1, which is mainly used for simplex communications, with no repeaters. The human voice is digitally sampled and compressed with the AMBE+2 codec, and then transmitted in this digital form to another radio. Tier 2: Things start to get a bit more complicated here. With Tier 2 DMR, repeaters are used in a TDMA arrangement, with two "timeslots. What this means is that two completely separate radio transmissions can be going through the repeater at the same time; each radio takes turns in transmitting in short 27.5 millisecond bursts. In addition to this, radios can be set to logical closed groups called ’talk groups’, which you can think of as ’virtual channels’. Repeaters can be linked via the internet to form networks that can be as small as just two repeaters, or thousands of repeaters across the world. Again, the AMBE+2 codec is used to turn speech into compressed data for transmission. All amateur radio DMR systems are Tier 2, as are many business / commercial radio DMR systems. Tier 3: This is effectively a trunked radio system on top of Tier 2. A pool of frequencies are used to carry the TDMA transmissions. This is used by more complex or larger networks for big businesses and commercial radio users.   The advantages of DMR: So why go to all this trouble, when plain old analogue FM works perfectly well? DMR has the advantage that it four times more efficient when it comes to spectrum usage. For one 25 kHz analogue FM channel, you could fit four DMR transmissions. Not only that, but DMR offers some very flexible calling facilities - you can call one person, a group of people, or everyone in your fleet at once. While not every DMR network supports it, sending of data and short messages is also possible. DMR is also designed to be easy to network, with connections using IP, so creating wide coverage areas using a network of DMR repeaters is already built-in; cover your city or cover the entire country! Yet another advantage is because a DMR transmitter is only turned on about half the time due to it transmitting in bursts, battery life is longer.   TYT's hugely popular MD-380 can be bought for around $100   Some DMR Jargon: Colour codes: Every DMR transmission uses a "colour code" which is very similar to CTCSS or PL tones in the analogue radio world. On a repeater or simplex frequency, every radio must use the same colour code to be able to communicate together. The main use for colour codes is for where two repeater coverage areas on the same frequency may overlap, different colour codes are used to ensure each radio accesses the correct repeater. Timeslot: For Tier 2 and 3 systems, a timeslot is a slice of time, about 30ms long, that a radio can transmit in, or receive in. There are two timeslots per frequency, and you need to have your radio configured for the right colour code for the repeater, the correct timeslot and correct talkgroup for you to be able to hear anything. Zones: This is simply a collection of channels & talkgroups, all grouped together in one "zone" or bank. A radio user can switch zones to access a different lot of channels & talkgroups that they may wish to use. Typically a zones are divided into repeaters for different areas, so you might have one zone for the west side of a city, and another covering the east side of the city - but there's nothing to say that you must set up a zone that way. Code Plug: This is a Motorola term that has stuck over the years, and in the DMR context means a complete configuration file of channels, talkgroups, zones, contacts etc. for a radio. The code plug can be saved to computer disc, and is used to program a radio to give it the functionality a user requires. CPS: Another Motorola term, meaning Customer Program Software. Simply put, this is the software you’d use to create a "code plug" and configure your radio. Hotspot: A small box that connects to the internet and acts like your own personal low power DMR repeater, useful if you're not in range of a DMR repeater to access. You can even take them with you and use your cell / mobile phone wireless data to connect the hotspot to the internet and be able to use DMR anywhere you get cellular signal. Most hotspots are multi-mode, handling not only DMR but DStar, Yaesu Fusion and P25 as well. ZUMspot, Jumbospot, Openspot, MMDVM etc are all examples of hotspots that you can buy or build yourself.   Radioddity GD-77, dual band, DMR & FM, I think the best bang-for-your-buck DMR portable, also around $100   So what's in it for me? The use of DMR in radio hobbyist circles falls into two categories: ham / amateur radio and scanning receiver use. Lets take a quick look at each: Ham radio: Hams have long taken advantage of surplus, second hand, or even new commercial radio equipment and re-purposed it for their own use, and DMR equipment is no exception. Worldwide, DMR enabled and connected repeaters are appearing and are interconnected to provide a huge linked network spanning the entire globe. Depending on the talk group selected, you could be communicating just around town, across your region, across the entire country, and some groups even cover the world. Motorola DMR equipment is frequently used, but increasingly the cheaper units, in particular TYT, have increased the affordability and availability of DMR equipment to the mass market. In some cases, you can get on air to the DMR scene for less than a hundred dollars! Scanning: As the world relentlessly marches on to a digital future, many businesses and commercial interests have migrated their legacy analogue FM two way radio systems to DMR. There are scanners available that can hear DMR, enabling the scanning hobbyist to continue to listen to such transmissions. For those hobbyists who can’t justify the high price tag of those scanners to listen in to DMR, there are other alternatives: certain computer software can decode DMR with a regular scanner and a ’discriminator tap’, or a ’virtual audio cable’ if using an SDR, or if portable DMR reception is desired, an entry level DMR transceiver from TYT or Radioddity will do the job very well - to keep yourself on the correct side of the law, you should disable any transmit capabilities of these transceivers.


As one of the most compact DMR mobiles in the market, the Radioddity DB25-D is about the size of a handheld radio. Small but powerful would be the perfect description for this palm size mobile radio.

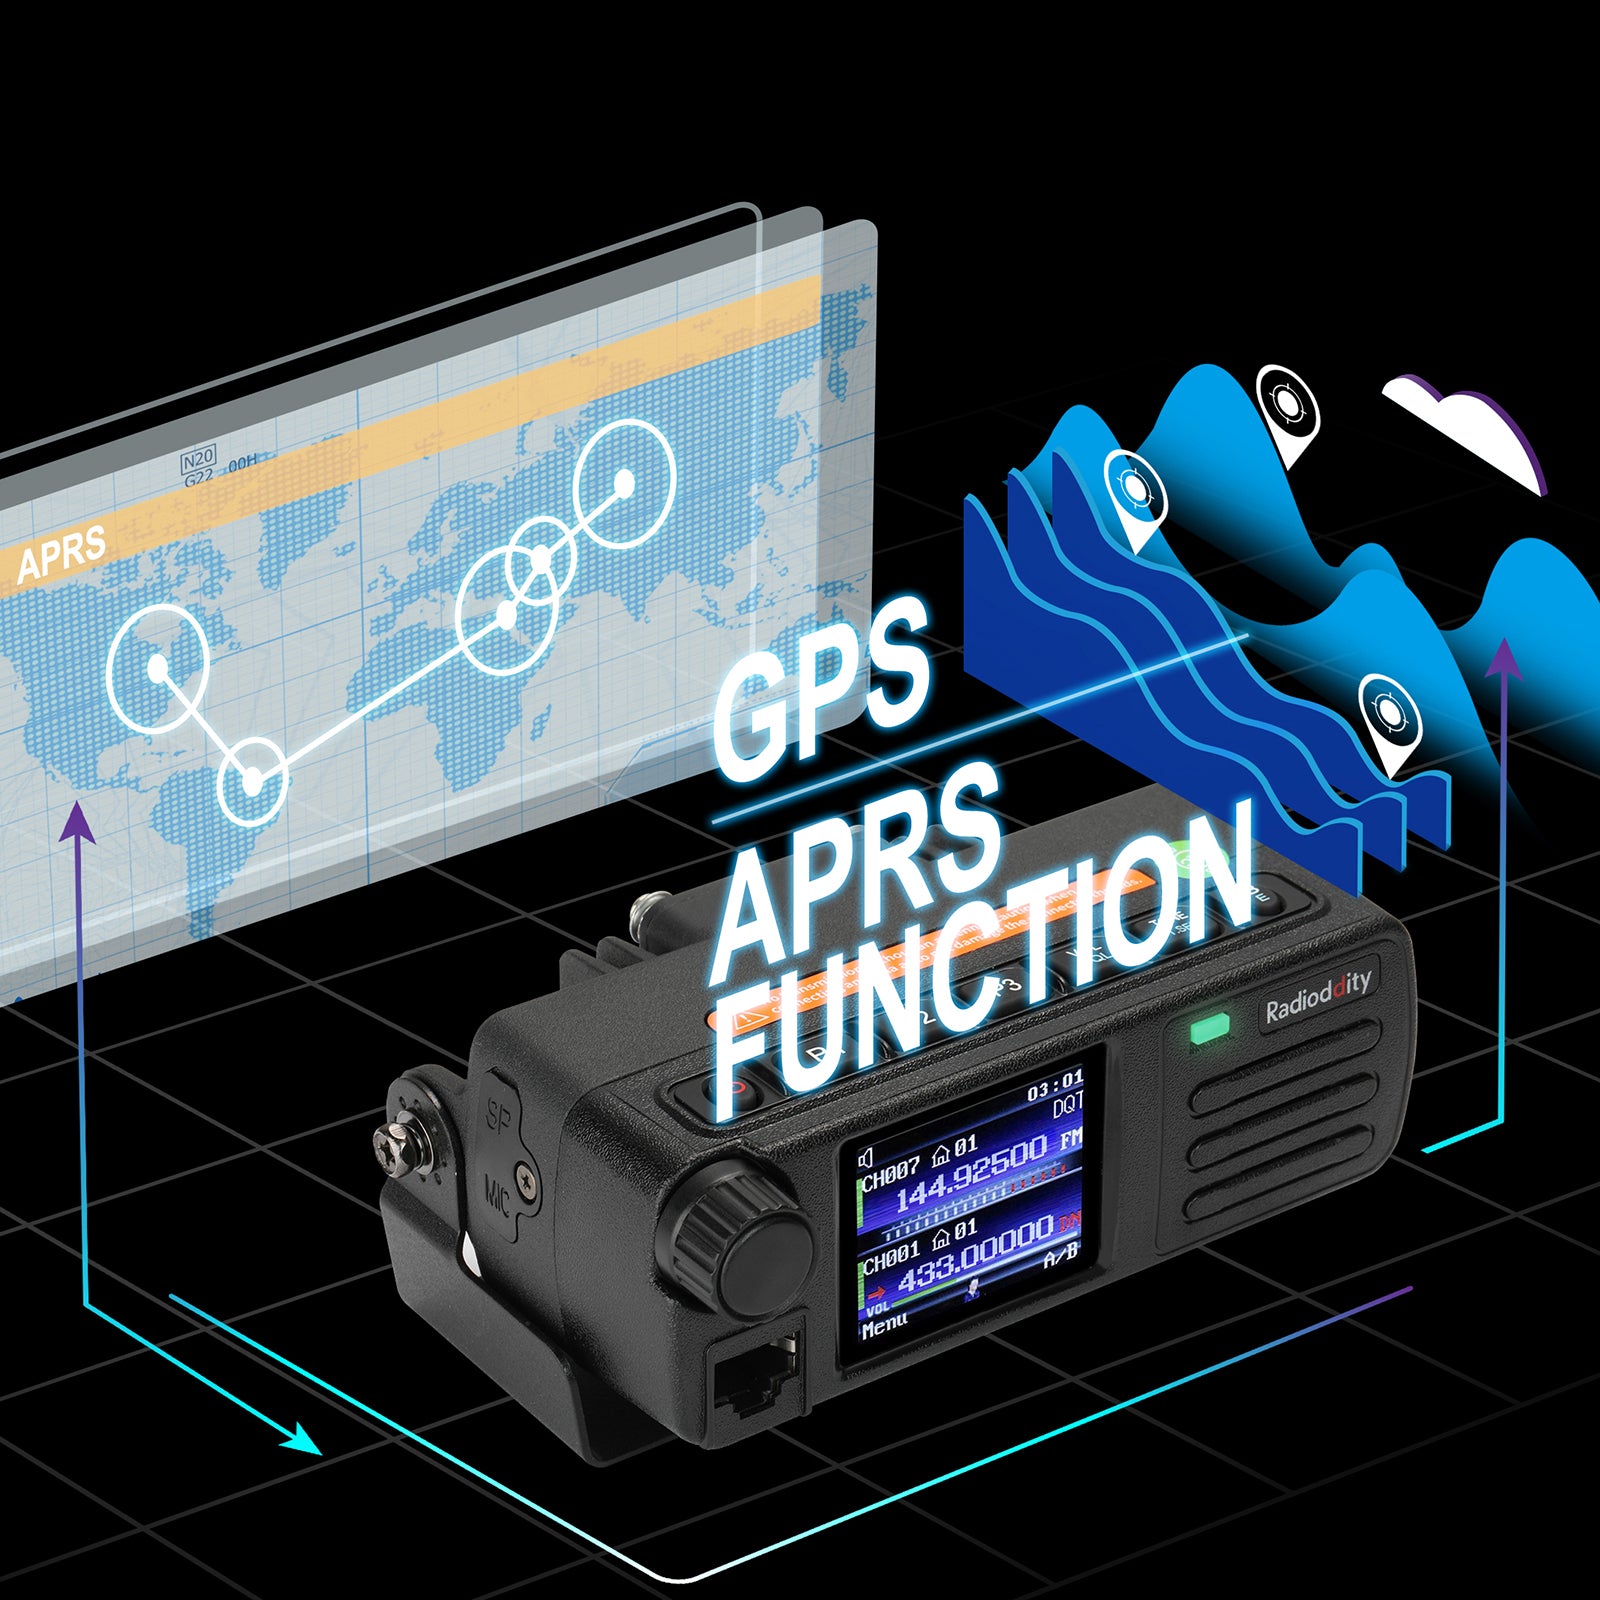
The DB25-D supports both digital and analog mode operation on VHF/UHF frequencies. It features 20W high power output, 300k DMR contacts storage and 7 customizable function keys. What’s more, DB25-D comes with GPS function, supporting APRS, being your ideal choice for off-road and outdoor use.
 

A_2_0f701025-f5f2-4837-b458-58badfd832dc.jpg A_03_98c5a7c1-1bf6-46ba-baae-2d9b891f891d.jpg A_5_37917fe7-a68a-4b34-81ce-92f49340ff32.jpg A_6_2c092cc4-0920-4a25-a86e-40517c2bac99.jpg

APRS enables your radio to send and receive packets of GEO-information include text messages, weather information, and GPS data. Your friends can track you easily when you’re traveling in the backcountry.

CLICK HERE to learn about how to set up APRS.

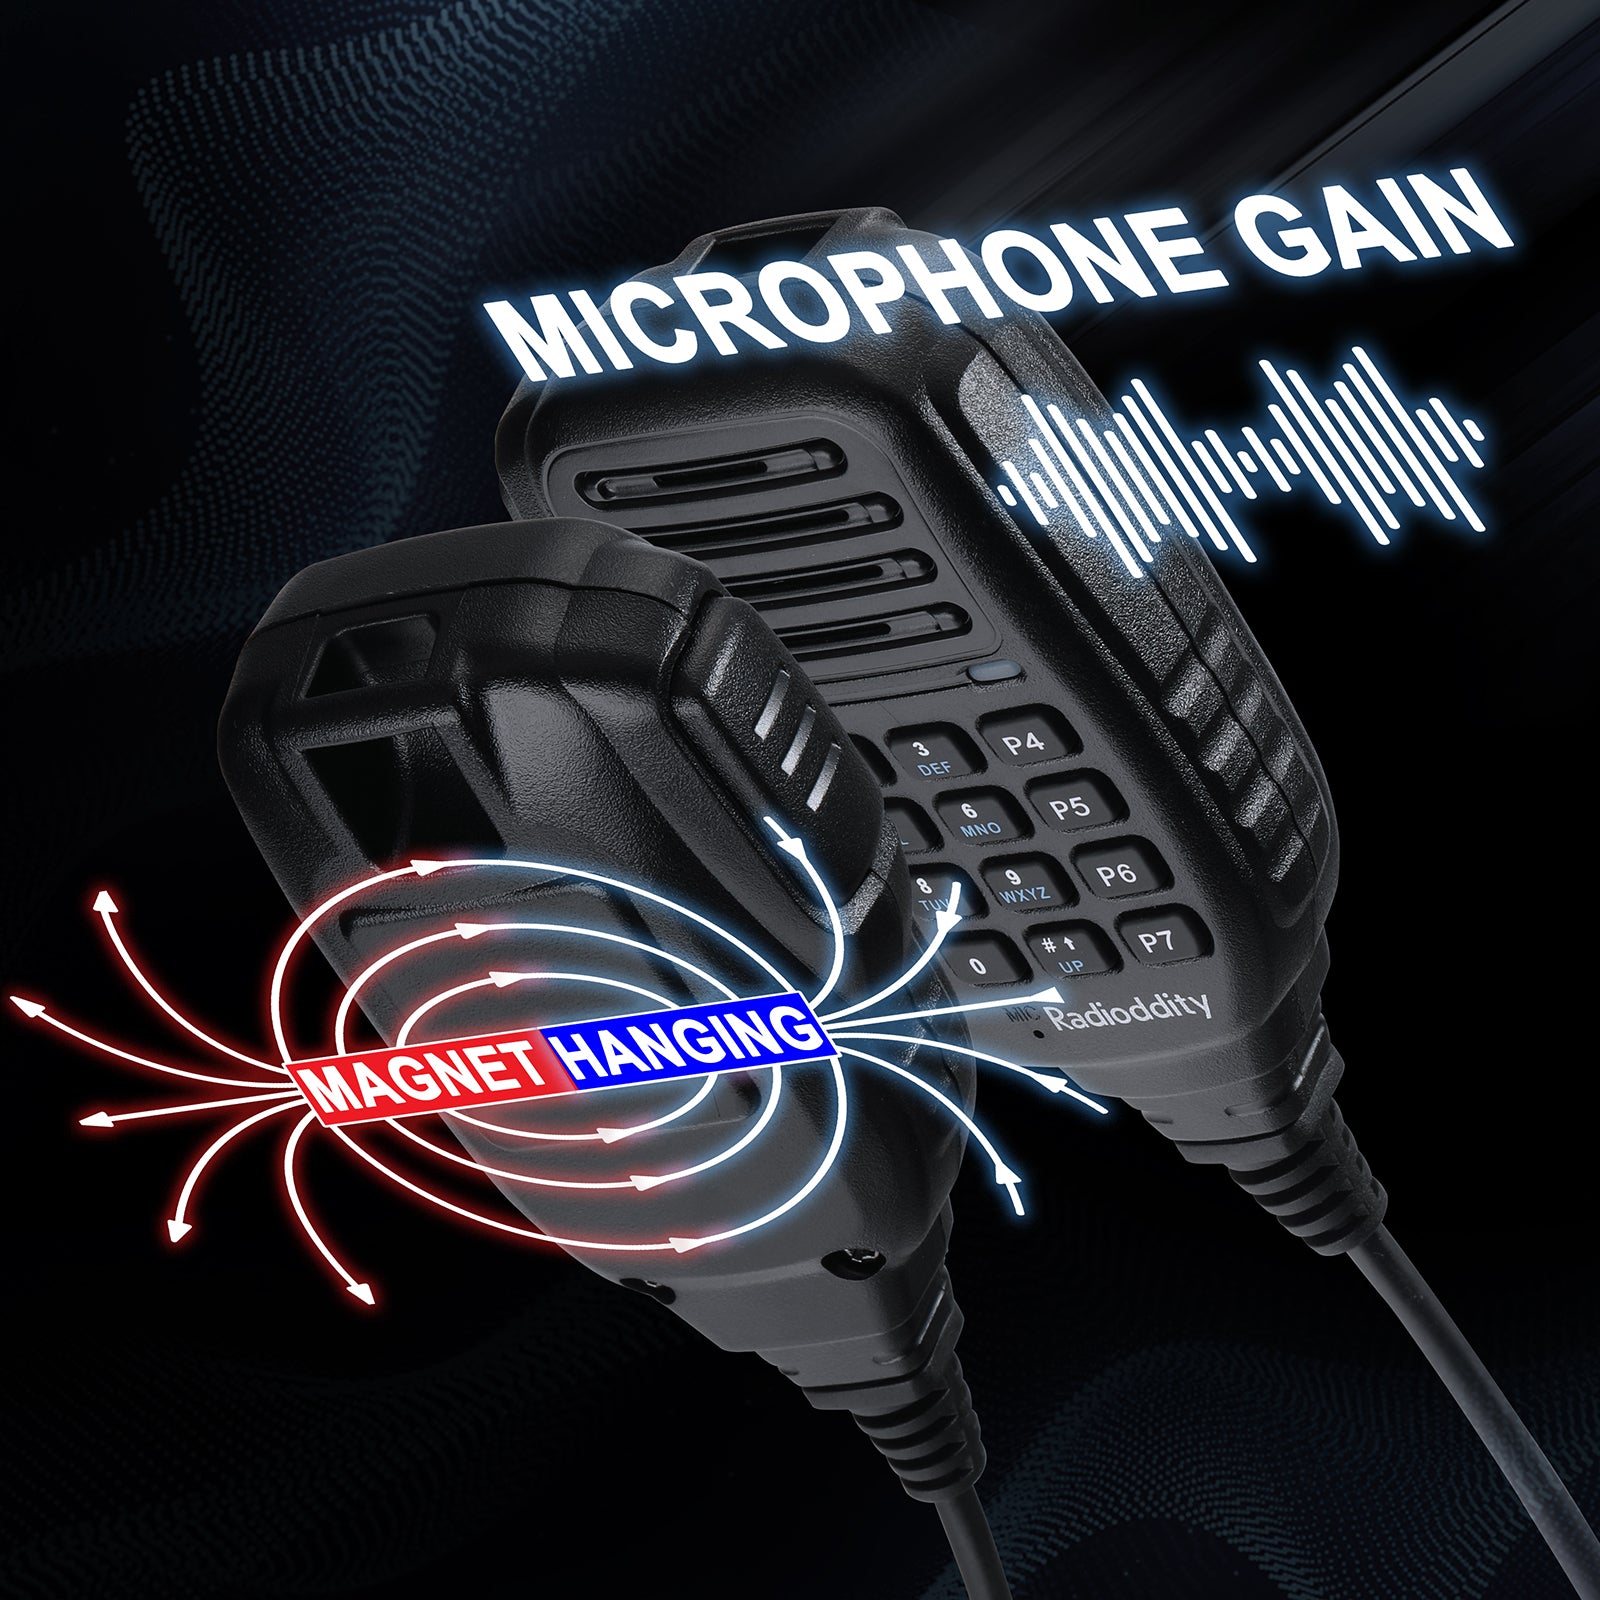
The Radioddity DB25-D comes with a microphone option, which can be set according to different situations in order to improve your TX audio quality.

Knowing the fact that more and more people are migrating to DMR operation, the DB25-D supports larger digital contacts storage while providing 198 hours of audio recording and with its dual mode capability, making migration even easier.

The DB25D has a total of 7 customizable function keys that can activate the preset functions. Each key has Long / Short press option, making up a total of 14 different functions being available with a single keypress.


Feature Functions

 - VFO, SMS, TOT, GPS, APRS, Alarm Mode
 - 198 Hours of Recording
 - 9 Level Squelch
 - DMR Tier 2 (for dual timeslot as required by repeaters)
 - Busy Channel Lock-out, Automatic Keypad Lock
 - IP54 Waterproof
 - Color Screen, Cooling Fan
 - 7 Customizeable function Keys
 - Programmable Microphone Gain
 - Speaker Mic with magnet for hanging
 

Radioddity DB25-D

Radioddity DB40-D

Frequency

Power Output

Screen

DMR ID

GPS Type

Customized Keys

Bluetooth Earpiece

Bluetooth PTT

Same frequecy repeater

SFR

Cross-band repeater

FCC ID

CE ID

Channel + Zone

Dual Watch

Beep Tone

Squelch Level

VOX

CTCSS & DCS

DTMF

STE-Squelch Tail Elimination

Power On Message

Repeater Tone

SMS

Time Slot Tier 1/2

VFO

Analog APRS

Digital APRS

Talker Alias

136-174/400-480@@10W/ 20W@@1.8" Color@@300K@@Passive@@7@@X@@X@@X@@X@@X@@2AN62-DB25D@@√@@4000@@√@@√@@√@@√@@√@@√@@√@@√@@√@@√@@√@@√@@√@@√@@√@@
136-174/400-480@@20W/ 40W@@2.4" Color@@500k@@Active@@10@@√@@√@@√@@√@@√@@VO6CDR-700UV@@√@@4000@@√@@√@@√@@√@@√@@√@@√@@ √@@√@@√@@√@@√@@√@@√@@√

Specifications
Frequency: VHF 136-174MHz | UHF 400-480MHz
Mode: Analog + DMR (Tier 2)
Power Output: 20W | 5W
Channels: 4000 (ch+zone)
Contact ID: 2000
DMR ID Data Base: 300,000
CTCSS/DCS: 51/108
Bandwidth: 12.5kHz/25kHz
Antenna Connector: SL16 / PL-Type
Compatibility: compatible with Mototrbo
Screen: 1.77〃TFT screen
Size: 4.8 x 2.6 x 1.7in | 12 x 6.5 x 4.2cm
Weight: 2lb | 0.9kg
Antenna Port: SO-239
Need Antenna with Port: PL-259
 

What's in the box
1 x Radioddity DB25-D Mobile Radio
1 x Mini GPS Antenna
1 x Programming Cable
1 x Extra Power Cable (connected with a car adapter)
1 x Mounting Bracket (with 2 screws)
2 x Mounting Screws
1 x Speaker Mic


1 Year and 6 months
Manufacturer's Warranty.
• This warranty from Radioddity covers all new items (except Xiegu brand) purchased from radioddity.com. For purchases made through other platforms like Amazon, eBay, and Walmart, we offer a 1-year warranty period from the date of purchase. The specific warranty terms may vary depending on the authorized dealer.
• This warranty cannot be transferred. You need to provide proof of purchase from us or an authorized dealer to avail warranty service.
• For Xiegu brand items, we offer a 1.5-year warranty for the G90, X6100, and X5105 models starting from September 14, 2022. All other models come with a 1-year warranty.


What Does This Limited Warranty Cover?

We warrant that the Products are free from defects in materials and workmanship under normal use and use in accordance with the respective Product user manual, during the Warranty Period. Please refer to the Instructions inside each package for a description of proper use and care of the unit.


What Does This Limited Warranty Not Cover?

This limited warranty does not cover damages directly or indirectly arising or resulting from or during:

(1) accident, misuse, abuse, vandalism or acts of God (including lightning and other weather conditions)

(2) use with another product or other damage or loss suffered by the use or combination of any other item

(3) improper or inadequate maintenance

(4) repairs by an unauthorized service technician

(5) normal wear and tear
 

Open Box

Open Box items are products that have damaged packaging or are otherwise not suitable to be sold as new. All items are tested to be working by a member of our team.

Open Box items come with a 6-month warranty instead of the standard 18 months warranty and are not eligible for any warranty extension offered to new products. We will not accept returns of Open Box items due to cosmetic damage or other non-performance-related issues. All sales of Open Box items are final and not eligible for a return or refund.

If for some reason the item is defective on arrival, please contact
support@radioddity.com so we can arrange a replacement.


If you are satisfied with our products and service, please kindly leave us a positive product review. Any problem, be free to contact us support@radioddity.com
We strive to answer all emails as quickly as possible, but due to high email volume, it may take time for us to reply. Thanks in advance for your patience!

Order Processing

All orders are processed within 1-2 business days after we receive your full payment, excluding weekends and holidays.

As soon as your order is ready, we’ll update the tracking number and send it to you if you’re a Radioddity Member. We highly recommend that you register as a Radioddity Member here. If the item you ordered is temporarily out of stock, our customer service team will reach out to you. You can choose to wait until the item is back in stock or cancel your order.

Please be aware that we have several distribution centers globally. Therefore, your orders may be shipped from various locations including the United States, Canada, Europe, or China, depending on the availability of the product in our inventory.
 

Flat Shipping Rates
 

Country

US

EU

Outside US & EU

  Free when order amount ≥ $99.99 Free when order amount ≥ $99.99 Free when order amount ≥ $99.99

Flat fee

$9.99

$9.99

$9.99

Ship from

➤ United States
➤ China

➤ Germany
➤ China

➤ China

Handling time 1-2 business days 1-2 business days 1-2 business days

Delivery time

5-7 business days

5-7 business days

7-15 business days

Note:

1. Customs fee included for US & EU countries.

2. Please note that taxes will be applied to shipping rates. These taxes will be calculated and added to your total at checkout.

3. US Shipping does not include Alaska, Hawaii and Puerto Rico area. Please contact us for a detailed shipping fee to these areas.

4. For EU countries, please be aware that the listed product prices do not include VAT.

5. For shipping options to other countries, please visit our EXPANDED INTERNATIONAL SHIPPING page.

6. Please be aware that for outlet items, pre-orders, and open box items, the shipping services and charges may vary.
 

How Do I Change The Shipping Address Or Cancel My Order


Contact support@radioddity.com (CLICK HERE) immediately if you need to change the shipping address or cancel your order. Please be advised that some orders are shipped very soon after placement and it will not always be possible to make changes to the shipping address and/or cancel the order.


Frequently Asked Questions


1. What forms of payment do you accept?
Radioddity.com currently accepts PayPal* or credit card for all orders.
*When purchasing with PayPal, your shipping address will automatically default to the address on file with PayPal, regardless of the shipping address you enter on your Radioddity.com order.

2. Why has my credit card payment failed?
Payment with a credit card may fail because of bank authorization and fraud prevention systems. If you are having trouble making a payment via Credit Card, you may contact your card issuing bank or PayPal directly. Here are PayPal's phone numbers:
+1-888-221-1161 (US & Canada Toll Free) +1-888-215-5506 (US & Canada Toll Free)
+1-402-935-7733 (International) +1-402-935-2050 (International)

3. How do I know if it is safe to shop with you?
Radioddity.com takes great pride in offering a safe and secure online shopping experience. We also respect your privacy and we're committed to protecting it.

4. Is there any discount for bulk/volume purchases?
Radioddity does provide discounts for some bulk/volume purchases. Please email our customer service for more details.

5. Do you ship internationally?
Yes, we do! We ship to US & EU countries. For some products, we ship to CA.

6. How can I contact Radioddity.com for additional assistance?
Email Customer service:
please email us via support@radioddity.com, and we will respond to your email as quickly as possible, usually within 24-48 hours.

7. How are warranties handled?
Repairs on defective merchandise are handled by the manufacturers and not by Radioddity unless otherwise indicated. If any item arrives damaged due to shipping, immediately contact the courier. Keep all shipping materials and contact us immediately.

8. Why didn't I receive an order confirmation email after my PayPal payment is completed?
We send a confirmation email to your primary PayPal email address or the e-mail address you have specified if you used the "PayPal Express Checkout" method. Make sure that you have a Radioddity account registered under your PayPal account's primary e-mail address.
In rare circumstances, a technical bug confirmed by PayPal can get in the way. If you do not receive any information at all, and your order does not appear in your Radioddity account, please contact us and send us your order details.

9. How do I change the shipping address or cancel my order?
Please contact customer service immediately if you need to change the shipping address or cancel your order. Please be advised that some orders are shipped very soon after payment and it will not always be possible to make changes to the shipping address and/or cancel the order.

10. What does Radioddity.com charge for shipping order and how long will it be before I receive my order?
Please CLICK HERE to learn about our shipping policy.

11. Do you ship to PO boxes or Military APO/FPO addresses?
Only USPS can ship to both PO Boxes and Military APO/FPO addresses. The items have to be less than 2kg. Please allow additional time for orders to be shipped to these addresses. Express shipping cannot be sent to both PO Boxes and Military APO/FPO addresses.

12. Why am I unable to track my order?
It can sometimes take 24-48 hours or so for tracking information to update once an order has shipped from our warehouse.
Occasionally, a package may not receive the proper origin and transit scans while on its journey to you, so neither us nor express is able to track the exact location of the package in transit.
Please email us if you do not receive your order by the end of the quoted time frame. Please note that orders shipping via UPS can be delivered as late as 9:00 pm local time in some areas.

13. Taxes, Customs, & Duties
If the package is checked by your country's customs office when the item arrives in your country, most websites are declaring that you are responsible for import duties, tariffs, and taxes. However, Radioddity will be happy to go fifty-fifty with customers. Quality customer service is our highest value and we try our best to reduce our customer’s loss.

14. How do I return products if I am unsatisfied?
Please CLICK HERE to learn about our return policy.

15. What do I do if received the wrong item?
Return the wrong item. If the item you received is completely different from the one you ordered, please contact our Customer Service with photos or videos of the different product. If a return is necessary, replacement plus return shipping cost will be issued to you on receiving the returned product. Or if you decide to keep it, we will offer a 10% discount for buying it.

16. How do I return defective items?
If your product turns out to be a defective one with physical damage within 30 days from the initial receiving date. You can mail the item back in the original package without any wear and tear for a free replacement. However, you will need to provide photos and videos showing the defect(s) of the product.
*NOTE: We strongly recommend obtaining and saving your return tracking number until you are notified that we have completed your refund.*

17. When will a replacement be sent?
Replacements are treated the same way as that of new orders -- they typically arrive in 10 to 13 days. If a product needs to be returned for replacement, the replacement is sent after receiving the returned item.

18. How long does it take for me to get a refund?
It may take 1 or 2 weeks for your return to reach our warehouse. Once it is received and inspected (usually within 72 hours of arrival) your refund will be processed and automatically applied to your credit card or original method of payment within 2 days. Please note that depending on your credit card company, it may take additional 2-10 business days after your credit is applied for it to post to your account.

USD